The fiber studio at my school, Finlandia University, is always alive and busy with activity; however, despite all of the work being done, we always find time for a little bit of play!
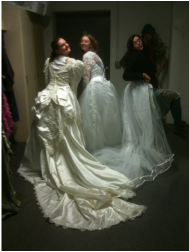
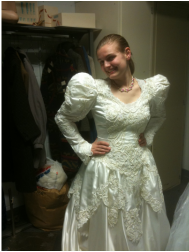
Recently Celebrations, a bridal shop in Hancock, MI, donated bridesmaid dresses, wedding dresses, and a variety of alterations scraps to Finlandia for the students of the fiber department to be inspired by and create new masterpieces from. Ever since their arrival in January, we have had periodic dress up times in order to find inspiration from the dresses.
Last night was especially entertaining....
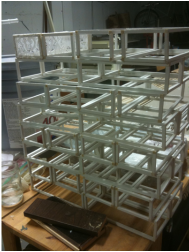
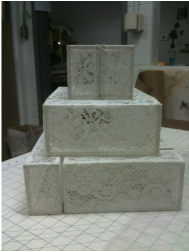
Now about the work. I cut the lace coverings out for about 80 bricks and glued the lace onto 6 brick forms. This is just enough bricks to give you a hint of the final sculpture.
I also finished the last ten of my clay forms! All that is left is to fire and glaze those final forms and create the hanging structure. I did spend a small amount of time in the wood shop painting some of the .25" x .25" x 4' rods. Today I will cut the painted rods down and continue constructing more brick forms. 76 down, 238 to go!
I opened the gas kiln today and found that my firing on Friday was a success! I now have 30 finished pieces for the second of my two sculptures. This week I plan on making 10-15 more to ensure that I have plenty of woven forms and some in reserve in case a few break. But before I can bisque anymore my professor and I have to replace the electric kiln's heating elements!
Here is how our kiln works. It is about four feet tall and is composed of three sections. Today we took the top half off.
Here you can see there are grooves inside the soft brick on the inside of the kiln. The heating elements rest inside of the grooves. First we removed the old heating coil to make space for the new coil. If you are wonder what the heating element is, it is a really long coil. The top and bottom coils for this kiln are 19 gauge wire, while the center coils are something like 24 gauge wire.
The kiln section shown in the picture above required a top coil that went into the first two rows of grooves. The smaller gauge, center coil went into the bottom two grooves pictured. The next section of the kiln will have eight rows of grooves that will all take center coils and the bottom section will be basically be an upside-down version of the section we fixed today.
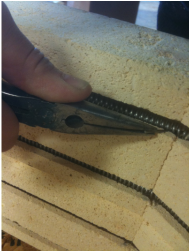
At every angle in the side of the kiln I had to pin the heating element coils down to make sure they would not pop out of the groove. In the picture I have the pin, which is basically a 1.5" piece of wire, gripped in the pliers and am inserting it at an angle through the rings in the coil and into the soft brick. Imaging 5'3" me bending over and reaching into the kiln section to pin these coils in, you might understand why I had to stop after finishing this section... you become slightly light headed after over forty pins! I am not looking forward to the taller middle section. I might need a step stool!
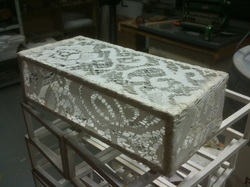
Despite a sticky assembly, it turned out quite nice!
As a kid I fondly recall the pleasure of gluing my fingers together with Elmers glue and then peeling off the glue once it had dried. Today I found myself doing just that; although, not intentionally.
While I continued the weekend's balancing routine around the wood shop (cutting, painting, gluing, and pin nailing the bricks), I did switch it up by testing a glue to adhere the lace to the wood brick forms. I have tried acrylic matte medium, rubber cement and regular white glue, but they either do not work, make the lace too plastic-like, or they dry yellow.
Today I tested the Elmer's brand of tacky glue and had success! It dried so that I did not see a color change, it stuck the lace to the wood and the lace to the lace... but not without turning my fingers into a sticky mess! It looks like I finally have a gluing method that will work and provide entertainment to those around me as well!
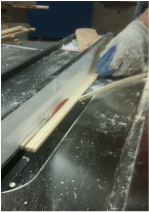
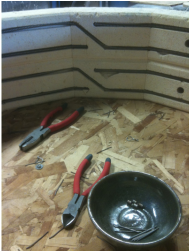
The feather board is the angled piece of wood on the right. It is helping press the board being cut against the white guard on the left.
I also learned a nifty trick from my professor Rick. We were cutting 6" x 1.25" x 4' boards into .25" x.25" x 4' rods and it was becoming a struggle to ensure even cuts. So we fashioned a "feather board" that keeps the board pressed against the guard so that more even cuts are ensured.
Tomorrow I will continue with my wood shop dance and cut, glue, paint, pin nail, and constructing these bricks. I currently have 76 frames, two of which are covered in lace and my final sculpture calls for 314 bricks. Wish me luck!

Myself and fellow Young Women's Caucus members making a color splash in New York City during week one.
Apologies to any readers, the past month and a half have been a whirl wind adventure between my internship in New York City and getting back into the swing of my Diploma Works Project. Let me attempt to fill you in on my current progress and the plan for the next month!
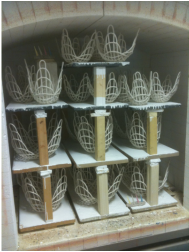
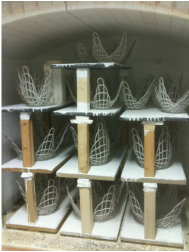
Last time we spoke I was in the clay studio creating the woven structures for the feminine sculpture. Four of those have since been bisque fired, glazed in a white glaze, and glaze fired. Twenty-three are cooling from a glaze firing as we speak. Seven are in line for the next glaze kiln firing. I will be making at least ten more for backup since these forms are fragile and prone to breaking.
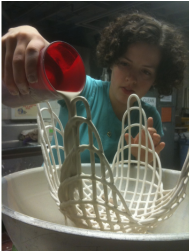
Glazing the woven forms too large to dip into the five gallon bucket of glaze. Thank you Susie for the photo!
The glazing process has been an enjoyable learning experience for me. I am now able to operate the bisque kiln, and even started one at 1230 am last week in order to have pieces glazed for the glaze kiln firing that was scheduled. This past week I made my first cone packs which give you an idea of how hot the glaze kiln has reached so you have an accurate gauge of when the kiln has reached a certain cone temperature so that you can turn it off.
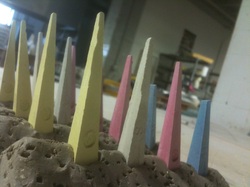
My first cone packs. I have included cones eight through eleven since I am shooting for cone ten glaze firings.
The first glaze kiln I loaded!
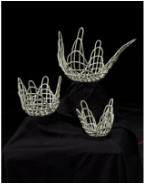
Three of the finished woven forms.
Since the ceramic sculpture is well underway I have begun work on the fiber sculpture that will be masculine. The challenging part is that I am using lace. How do you make lace masculine? This is the very question that I was struggling with during my time in NY. I believe that i have found an answer to that question and I have begun construction on a sculpture that is that answer. The sculpture will be be comprised of 314 bricks made of lace. You will have to wait till the end to see how they are constructed; I have to leave a little ounce of mystery!
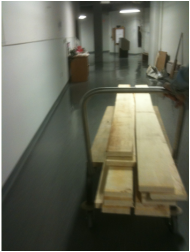
Began with 2' x 6' x 8' boards of poplar wood because it is a light color.
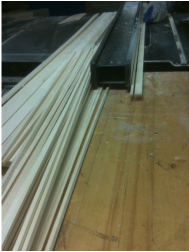
Planed the wood and cut it down into .25' x .25' x 4' rods
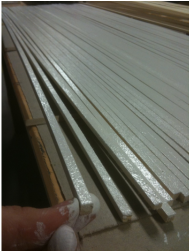
Painted white.
Cut and nailed into the brick forms. This is the first 31 bricks that I have completed. 283 bricks to go!
With that I am off to work on producing more bricks! I will atte
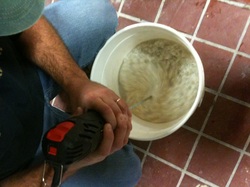
Based on a comment left on my last post, I have decided to share the process of making paper clay with you. Here is what you need to know: H2O + cellulose fiber = Pulp + Clay Body= Paper Clay.
Simple.
Toilet paper and a white stoneware body were utilized in the making of my paper clay. First pulverize the crap out of the cellulose fiber (toilet paper) in enough water to allow a drill mixer to spin without making a sound that I imagine an asthmatic cow would make. Once the fiber has assumed the look of a cotton field after a rainstorm you are ready to squeeze all of the water out. The now slightly dehydrated paper pulp can be added to the ingredients that will make up the clay body. A pug mill is the best way to achieve a consistent texture. The clay body looks the same; however, upon close inspection you should notice the fibers along an edge of the clay that has been torn apart. These miniscule fibers give the clay body a new structural quality that allows for delicate forms, smaller detail, and crazy ideas never before imagined in clay. The firing process works typically the same for the clay body, with or without fibers introduced. During the bisque firing process all of the fibers are burned away.


 RSS Feed