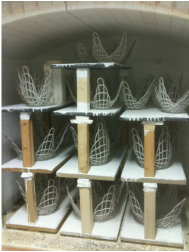
I opened the gas kiln today and found that my firing on Friday was a success! I now have 30 finished pieces for the second of my two sculptures. This week I plan on making 10-15 more to ensure that I have plenty of woven forms and some in reserve in case a few break. But before I can bisque anymore my professor and I have to replace the electric kiln's heating elements!
Here is how our kiln works. It is about four feet tall and is composed of three sections. Today we took the top half off.
Here is how our kiln works. It is about four feet tall and is composed of three sections. Today we took the top half off.
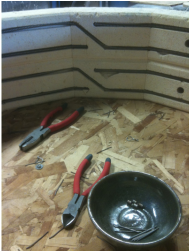
Here you can see there are grooves inside the soft brick on the inside of the kiln. The heating elements rest inside of the grooves. First we removed the old heating coil to make space for the new coil. If you are wonder what the heating element is, it is a really long coil. The top and bottom coils for this kiln are 19 gauge wire, while the center coils are something like 24 gauge wire.
The kiln section shown in the picture above required a top coil that went into the first two rows of grooves. The smaller gauge, center coil went into the bottom two grooves pictured. The next section of the kiln will have eight rows of grooves that will all take center coils and the bottom section will be basically be an upside-down version of the section we fixed today.
The kiln section shown in the picture above required a top coil that went into the first two rows of grooves. The smaller gauge, center coil went into the bottom two grooves pictured. The next section of the kiln will have eight rows of grooves that will all take center coils and the bottom section will be basically be an upside-down version of the section we fixed today.
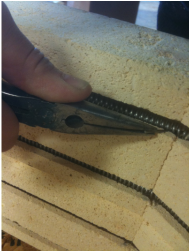
At every angle in the side of the kiln I had to pin the heating element coils down to make sure they would not pop out of the groove. In the picture I have the pin, which is basically a 1.5" piece of wire, gripped in the pliers and am inserting it at an angle through the rings in the coil and into the soft brick. Imaging 5'3" me bending over and reaching into the kiln section to pin these coils in, you might understand why I had to stop after finishing this section... you become slightly light headed after over forty pins! I am not looking forward to the taller middle section. I might need a step stool!


 RSS Feed